Runtime generation in Unity
This guide provides an overview on how to get runtime generations within a Unity project.
Prerequisites
Follow the instructions here to ensure you have:
- An account set up
- An API KEY
- Sufficient generation credits
There is no requirement to install the python or node SDK as we will be using C# in Unity to directly interact with our REST API.
Running the example project
- Clone the UnityMPXApiExamples project.
- Open the project via Unity Hub using the 'Add project from disk'. Note requires Unity
2022.3.60f1. - Open the
DemoScenelocated underAssets/Scenes. - Update the variable
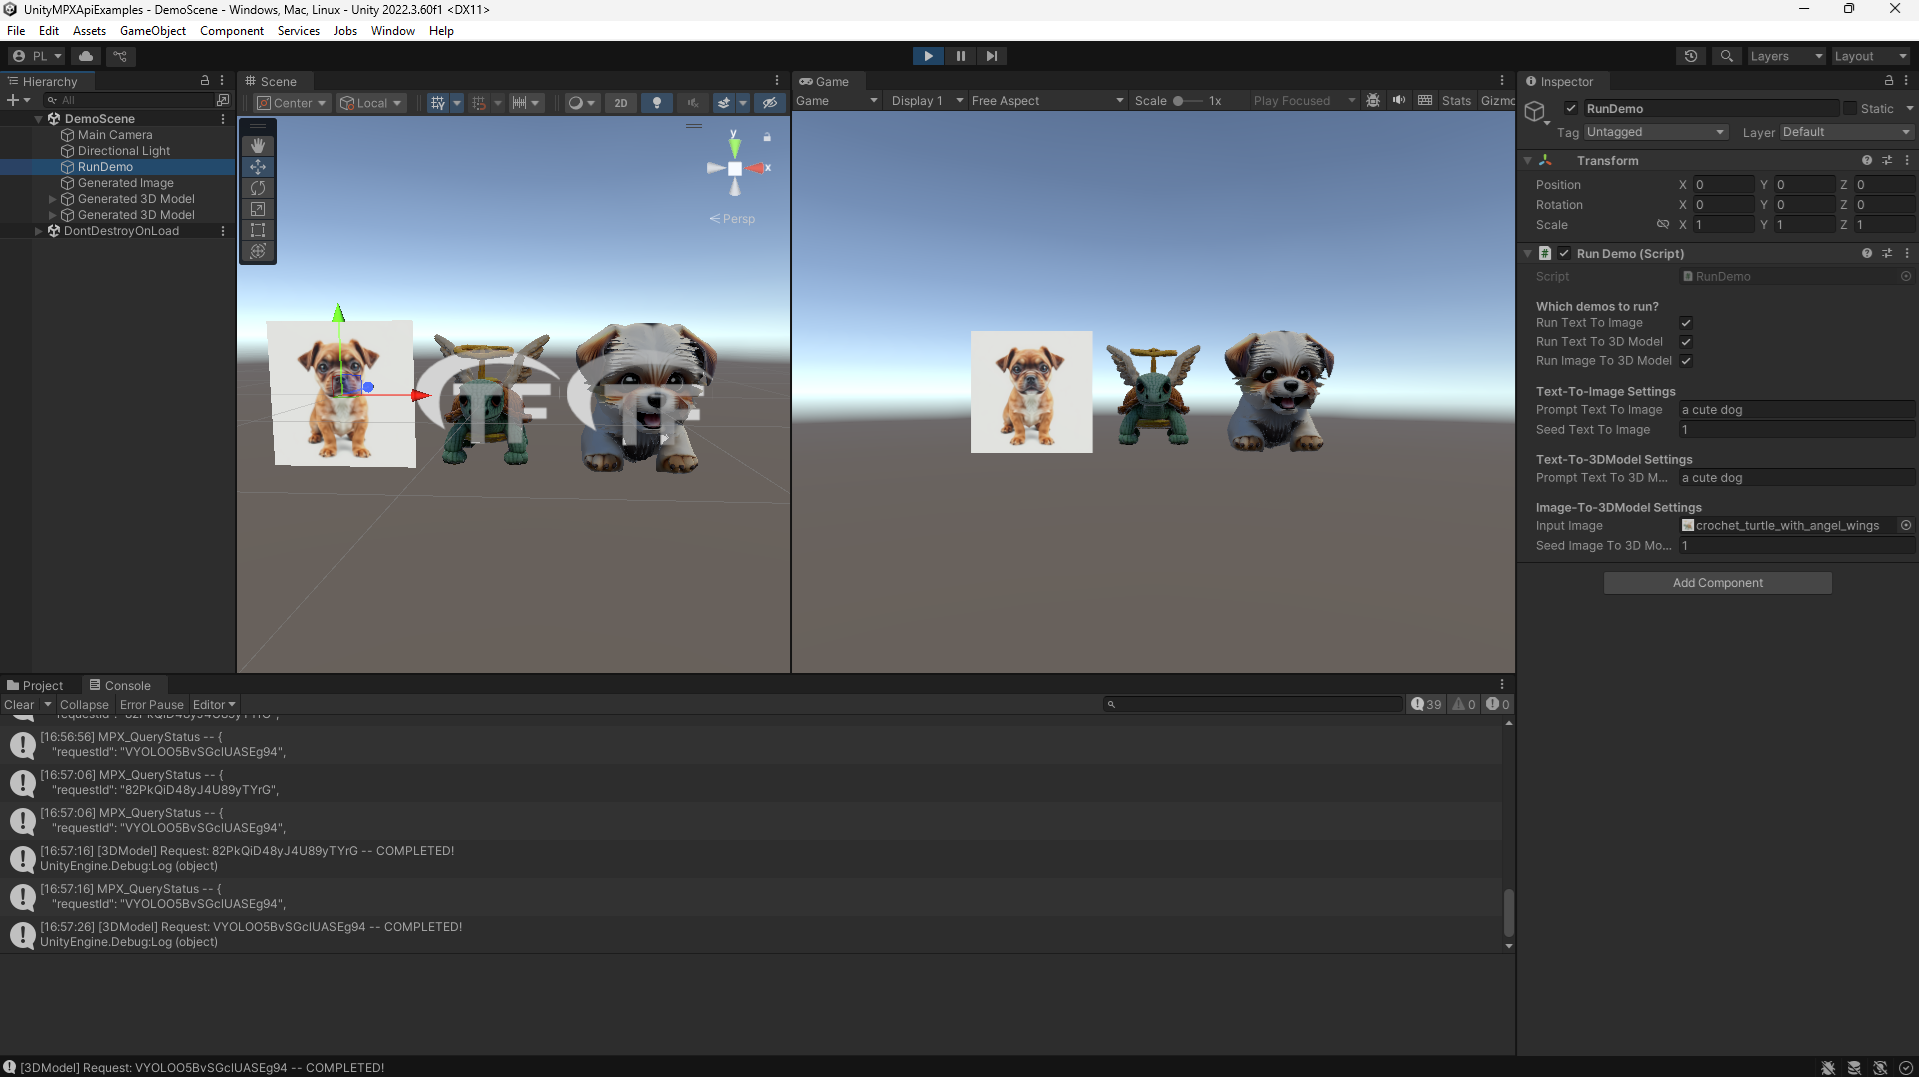
MPXSecretToken(on line 40) in the scriptRunDemo.cs(located under theAssetsfolder) with your own API KEY that you should have obtained from Step #1 of the Prerequisites section. - Hit play and wait for the generations to pop-up. It should take ~2 mins to generate everything but exact runtime will depend on server load. See below for example output after the generations are completed.

Video walkthrough of getting setup and running the UnityMPXApiExamples project
Technical Walkthrough of Examples
The main script of interest in the UnityMPXApiExamples project is RunDemo.cs.
In the Start function you will see the three main generation functions MPX_TextToImage, MPX_TextTo3DModel and MPX_ImageTo3DModel which generate the media asset as their corresponding function name suggests.
Additionally, a key function of interest is the coroutine MPX_QueryStatus which handles polling the server for updates and also the post-processing of the result. In the case of RunDemo.cs, the post-processing is just downloading the generated media asset and displaying at runtime.
MPX_QueryStatus
When you call one of our API endpoints you will obtain a unique requestId to help you track your generation request and it's status as it works it's way through our servers. The function MPX_QueryStatus takes a requestId and continuously polls the server, every 10 seconds, to determine if the generation request is complete or failed. You can increase the polling rate but keep in mind that there are rate limits, even if they are much less strict than the generation rate limit.
Once the request is finished a delegate function is called which handles both the complete and failed status cases. Two example implementations of this delegate function is provided: CompleteGenerationRequest_Images and CompleteGenerationRequest_3DModel.
- The
CompleteGenerationRequest_Imagesis used to download generated images and display each of them as textured quads. - The
CompleteGenerationRequest_3DModeldownloads the generated 3D model and displays it in the scene.
Feel free to customize these functions (or make your own) to suit your use cases.
In the next three sections we will cover in greater detail how MPX_TextToImage, MPX_TextTo3DModel and MPX_ImageTo3DModel are implemented.
MPX_TextToImage
In this function we make a call to the text-to-image endpoint and generate a single image using the PromptTextToImage and SeedTextToImage variables. For simplicity we've hardcoded the other parameters so feel free to adjust them as you see fit.
To make the POST request we utilize the RestClient library to send the endpoint the appropriate data. Then the endpoint responds with a StatusResponse data structure which contains: the unique requestId, status of the request and balance of credits in your account. Next we call MPX_QueryStatus and pass it CompleteGenerationRequest_Images as the post-processing function.
The MPX_QueryStatus coroutine will continuously poll the server every 10 seconds for the status of your requestId and once it's done it will call CompleteGenerationRequest_Images to download and display the generated images as textured quads.
MPX_TextTo3DModel
Similar to MPX_TextToImage except we call the general text-to-3d endpoint with just the single variable PromptTextTo3DModel.
We do the same process to execute the POST request and similarly we run MPX_QueryStatus in the same manner to poll the request until it's finished.
We run the CompleteGenerationRequest_3DModel at the end instead and utilize the glTFast library to download the generated GLB model and display it at runtime.
MPX_ImageTo3DModel
Unlike MPX_TextToImage and MPX_TextTo3DModel, the image-to-3d endpoint requires an image as input. If you supply a URL to an image then the way to execute the POST request will be similar to MPX_TextToImage and MPX_TextTo3DModel.
For this example, we load an image within the Unity project as a Texture2D, convert it into a PNG and send the bytes to the create asset ID endpoint so that it lives on the servers. Then we call the image-to-3d endpoint with the asset ID created for the image so that the server knows which image will be used as input.
Similar to MPX_TextTo3DModel, the MPX_QueryStatus coroutine is called with CompleteGenerationRequest_3DModel running at the end to download and display the generated 3D model at runtime.
Gotcha's and notes
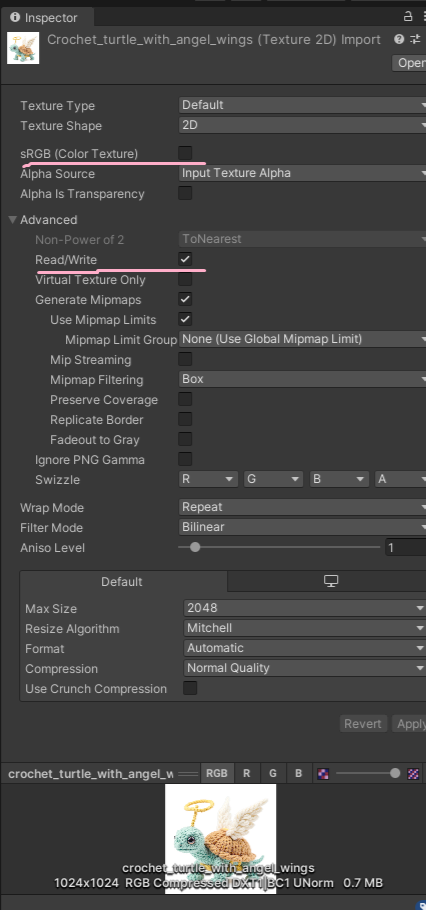
Make sure to use linear colorspace (instead of the default sRGB) and enable the Read/Write option when using Texture2D imports as images for 3D model generation. If sRGB is enabled then your models will appear darker than expected. See image below for the specific settings in the Unity inspector.

Updated 11 months ago